
I have taken on a project. I love wooden dolls, old & new.
Have you heard of Gail Wilson? She is a wonderful artist who
specializes in cloth and wooden dolls, as well as their accessories.
Some of her dolls are reproductions of antique dolls. If you do a
google search using her name, you will find her website of gorgeous,
primitive things. Her items are a bit on the pricey side, but she does
have sales once in awhile. I have admired her things for several years
without purchasing anything. She has been having a sale and I finally
made my mind up to order one of her doll kits. I would have much rather
bought a finished doll, but I would have had to take out a loan for the
one I wanted!
I love the old Joel Ellis and Mason Taylor jointed wood dolls, also
known and the Springfield Woodens. The kits for these dolls are
discontinued in the 12 inch size, and on sale, although she is close to
being sold out of them. She had only one left the last time I looked.
Anyway, I managed to get one and it includes lots of extras. Because I
don’t sew very well, I also purchased a finished dress and a dress
form.
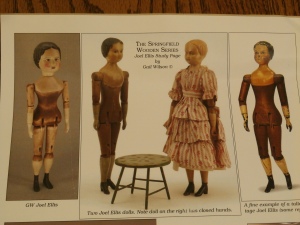
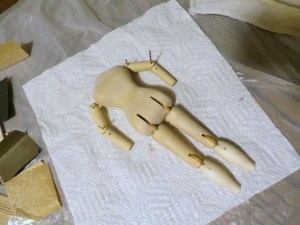
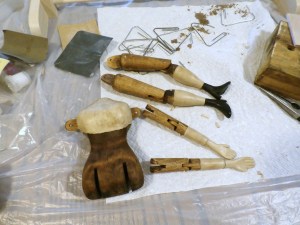
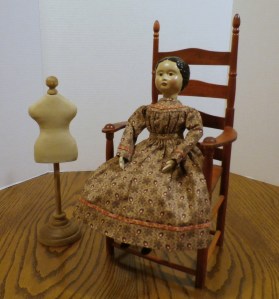
The photo above shows the doll I am making on the far left, and antique dolls in the other two photos. So far, I have shaped the body blank, which was a rough cut blank, very rough! Not only was it rough, it was larger on one side than the other, so I had to really work with it to get it close to being symmetrical. For my first time doing something like this, I think I did okay. I wish I had taken a before photo! I believe this was intentional to help teach beginners a few lessons in carving & sanding.
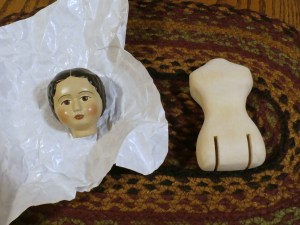
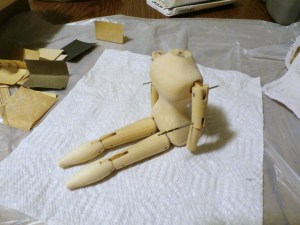
Here’s my body blank all shaped and sanded smooth. So far, this is all I have had time to do. I hope to get more done on it very soon. The beautiful head was painted by Gail Wilson for free as an incentive to sell the remaining kits. That was a deciding factor in me purchasing the kit.
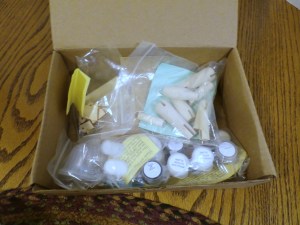
I admit that when I opened the box and saw all the little pieces, I was completely overwhelmed! And truthfully, I still am, although I have read all the directions several times. At least now I better understand everything that has to be done, and it’s a long list! This is one of those things you have to tackle one bite at a time! I know it will be worth it in the end.
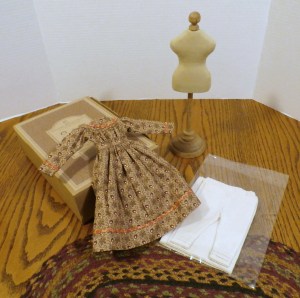
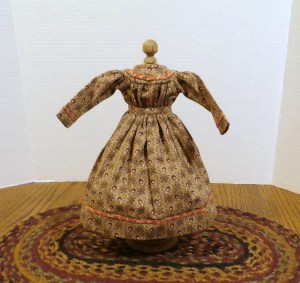
Here’s the dress form, dress and undies set. Isn’t the dress pretty? I love the period correct details. Joel Ellis was so proud of the beauty of his dolls and their wonderful joints that he didn’t like to see them wearing clothes. But I’m sure parents who bought these dolls for their little girls wanted them properly dressed.
So now you can see what I will be doing for the next few weeks. I was hoping it wouldn’t take too long to finish it, but I’m afraid it will take me quite awhile. Hubby is going to help me drill the tiny holes for pegging the arms & legs. Please wish me well with this. I thank you in advance!
Part Two

The photo above shows the doll I am making on the far left, and antique dolls in the other two photos. So far, I have shaped the body blank, which was a rough cut blank, very rough! Not only was it rough, it was larger on one side than the other, so I had to really work with it to get it close to being symmetrical. For my first time doing something like this, I think I did okay. I wish I had taken a before photo! I believe this was intentional to help teach beginners a few lessons in carving & sanding.

Here’s my body blank all shaped and sanded smooth. So far, this is all I have had time to do. I hope to get more done on it very soon. The beautiful head was painted by Gail Wilson for free as an incentive to sell the remaining kits. That was a deciding factor in me purchasing the kit.

I admit that when I opened the box and saw all the little pieces, I was completely overwhelmed! And truthfully, I still am, although I have read all the directions several times. At least now I better understand everything that has to be done, and it’s a long list! This is one of those things you have to tackle one bite at a time! I know it will be worth it in the end.


Here’s the dress form, dress and undies set. Isn’t the dress pretty? I love the period correct details. Joel Ellis was so proud of the beauty of his dolls and their wonderful joints that he didn’t like to see them wearing clothes. But I’m sure parents who bought these dolls for their little girls wanted them properly dressed.
So now you can see what I will be doing for the next few weeks. I was hoping it wouldn’t take too long to finish it, but I’m afraid it will take me quite awhile. Hubby is going to help me drill the tiny holes for pegging the arms & legs. Please wish me well with this. I thank you in advance!
Part Two
Hi Friends! I hope you all are well. I wanted to give an update on
the doll kit I have been working on. And I do mean work! She was a
LOT of work, with many, many steps, but so worth it.
Here, all the parts have been shaped & sanded. I did a test fit to make sure the joints would bend properly before staining, painting, antiquing & attaching permanently. I had to do this several times before it was good enough, but finally did it.
She passed the “sit test.” These dolls do not work well with stands, so they must be able to sit properly.
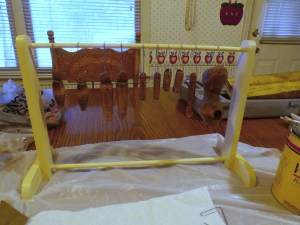
Just showing the stain drying. After that, the painted areas had to be done and then varnished & sealed. My little doll closet hanger thingy worked great for this. The hooks are opened paperclips.
The pewter hands & feet also had to get several coats of paint and varnish & sealer, as well as antiquing.
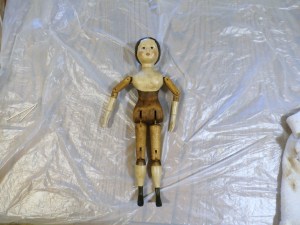
Here she is all put together, pegged and head attached.
Showing that she does indeed sit well.
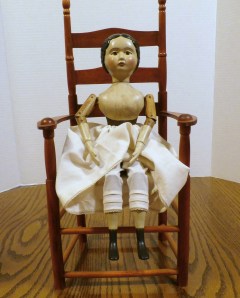
Wearing her pretty unders. I purchased these, her dress and dress form already made (for those who have not read my last blog entry).
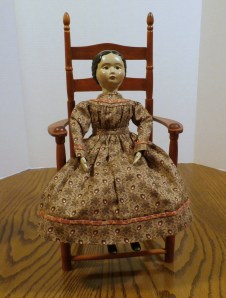
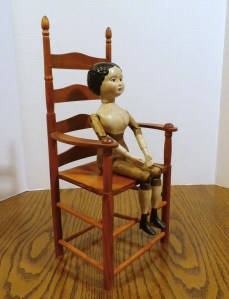
And now at last, all dressed in her pretty dress and sitting in a chair that is too big for her. Finding a chair the right size is my next mission, but this will do for now.
Please meet Hattie! Maybe she will get another dress to display on her dress form soon.
After all the hard work and doubt of ever finishing, I am very proud that I did actually complete her. Not sure if I will ever take on anything else like this again, but glad for this experience. I really love my new doll and I hope she will hold special meaning for my family knowing that I made her.
Be blessed!

Here, all the parts have been shaped & sanded. I did a test fit to make sure the joints would bend properly before staining, painting, antiquing & attaching permanently. I had to do this several times before it was good enough, but finally did it.

She passed the “sit test.” These dolls do not work well with stands, so they must be able to sit properly.

Just showing the stain drying. After that, the painted areas had to be done and then varnished & sealed. My little doll closet hanger thingy worked great for this. The hooks are opened paperclips.

The pewter hands & feet also had to get several coats of paint and varnish & sealer, as well as antiquing.

Here she is all put together, pegged and head attached.

Showing that she does indeed sit well.

Wearing her pretty unders. I purchased these, her dress and dress form already made (for those who have not read my last blog entry).

And now at last, all dressed in her pretty dress and sitting in a chair that is too big for her. Finding a chair the right size is my next mission, but this will do for now.

Please meet Hattie! Maybe she will get another dress to display on her dress form soon.
After all the hard work and doubt of ever finishing, I am very proud that I did actually complete her. Not sure if I will ever take on anything else like this again, but glad for this experience. I really love my new doll and I hope she will hold special meaning for my family knowing that I made her.
Be blessed!
Oh wow, what an amazing kit set and work you have done. She is certainly a doll to be very proud of. She is wonderful. Well done. Wish the prices weren't so prohibitive to get over to here. Still perhaps just as well!
ReplyDeleteThank you! It was the hardest thing I have ever tried to make. I almost gave up, but my hubby pushed me to finish it. And he did help with drilling those tiny holes. Now I'm so glad that I didn't give up. She is another favorite. :o)
ReplyDeleteHattie is awesome!! All of Gail's kits are meticulous and overwhelming, but as you say, one step at a time and at the end you have an heirloom quality doll, like Hattie.
ReplyDeleteI had a Great Aunt Hattie, so the name is dear to me. You have created a beautiful doll.
warmly,
Beth
Thank you, Beth! I'm glad that I finished her. I hope my family will love her long after I'm gone. :o)
ReplyDeleteLovely lady! Just getting caught up on your posts instead of letting myself fall asleep. I think you SHOULD be proud! :)
ReplyDeleteThank you, Aunt Lou! :o)
ReplyDelete